Ingest a Document and Upload Data
To ingest a document in the NFDI-MatWerk Data Repository, you need to be a registered user. Ingesting a document is done in two steps. In the first step, a data resource is created. A data resource is a set of administrative metadata like Title, Language, Publisher, Publication Year, Access Control, etc. which pertain to one data or a set of data which may contain different types of data. These administrative metadata are selected from the Datacite metadata schema. After a data resource is created, it should be edited to add the related data as content to the data resource.
The data ingest can be done either via the brower based graphical user interface (GUI) or via REST-API.
Using the GUI
-
Open the GUI of the NFDI-MatWerk Data Repository.
-
Log in by clicking on the blue Login button on the top right corner.
-
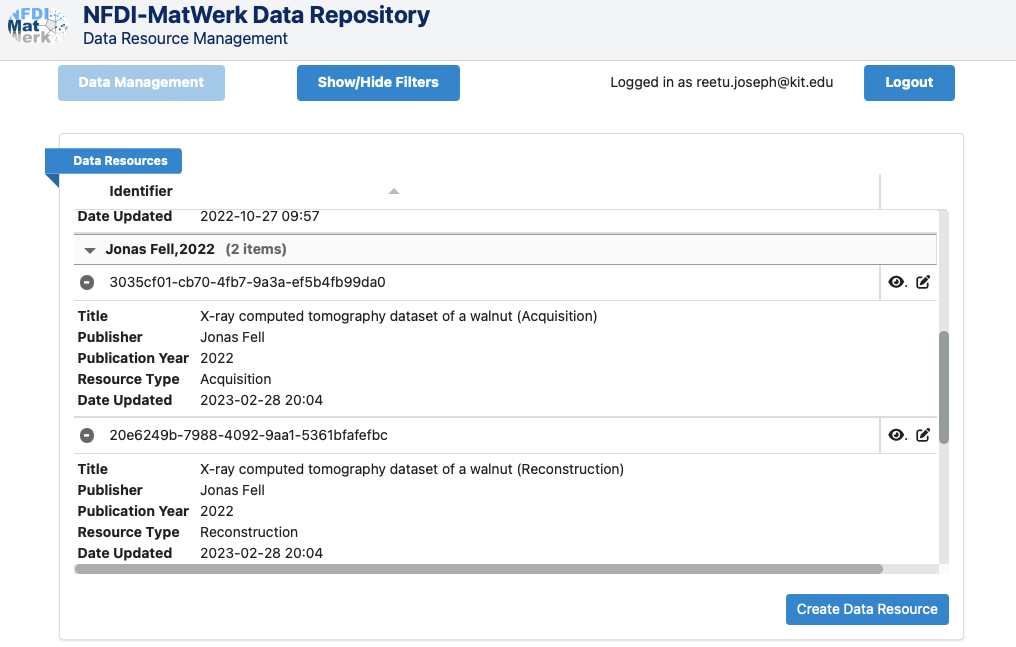
After logging in, click on Create Data Resource button at the bottom right.

-
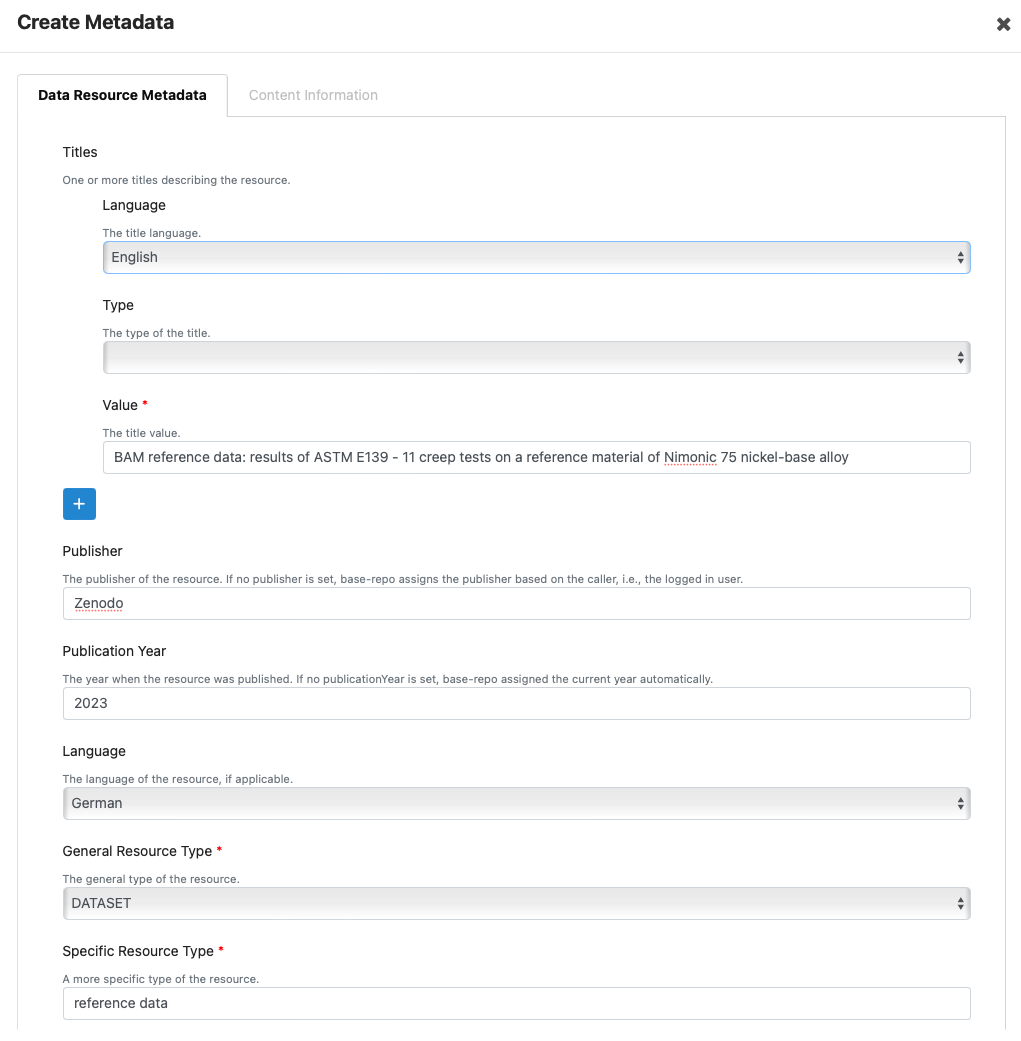
Fill in the fields for the data resource metadata in the new window.

-
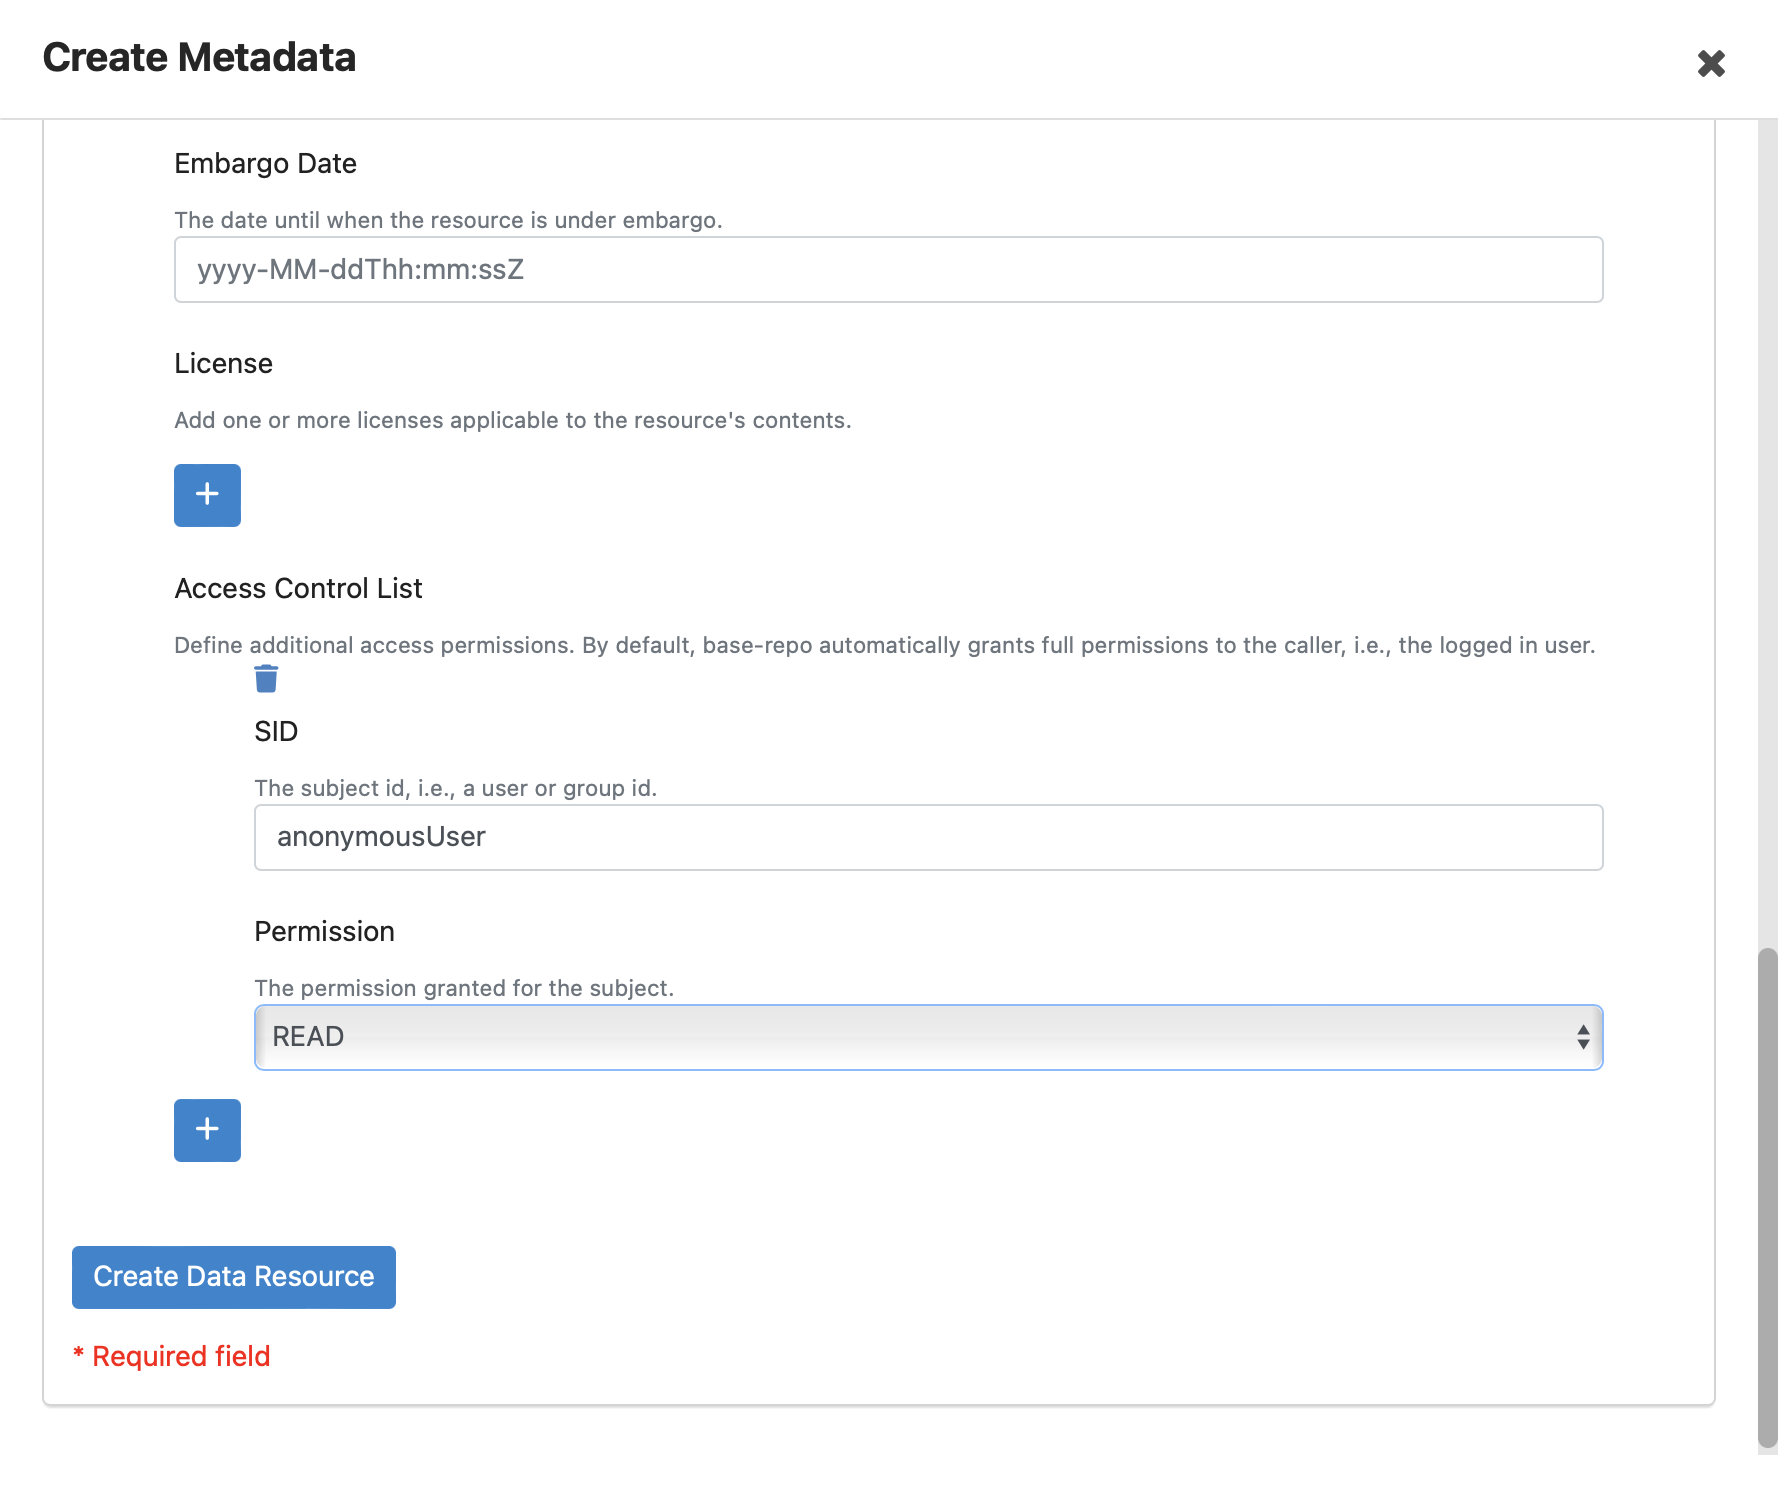
Scroll down to the Enhanced Metadata section and create the access control list. A detailed explanation is provided here. For making the data resource publically available, set subject-id (SID) to
anonymousUserand permission toREAD. Access can also be granted to selected user(s) or group(s), provided their SIDs are known.
-
Finish creating the data resource by clicking on the blue Create Data Resource button on the botton left. See image above.
-
After the data resource has been successfully created, we can now move on to the next step, which is attaching the data content to it. The newly created data resource now has its own unique identifier (UID) and is displayed on the front page. The UID can now be used to view the document with the metadata and the individual content data.
-
The UID in the example below is
f4db4926-5dc7-4d23-afec-12168f148ccaas seen on the far left of the listing. Click on the edit button to the far-right of the data resource listing, to attach a document to it.
-
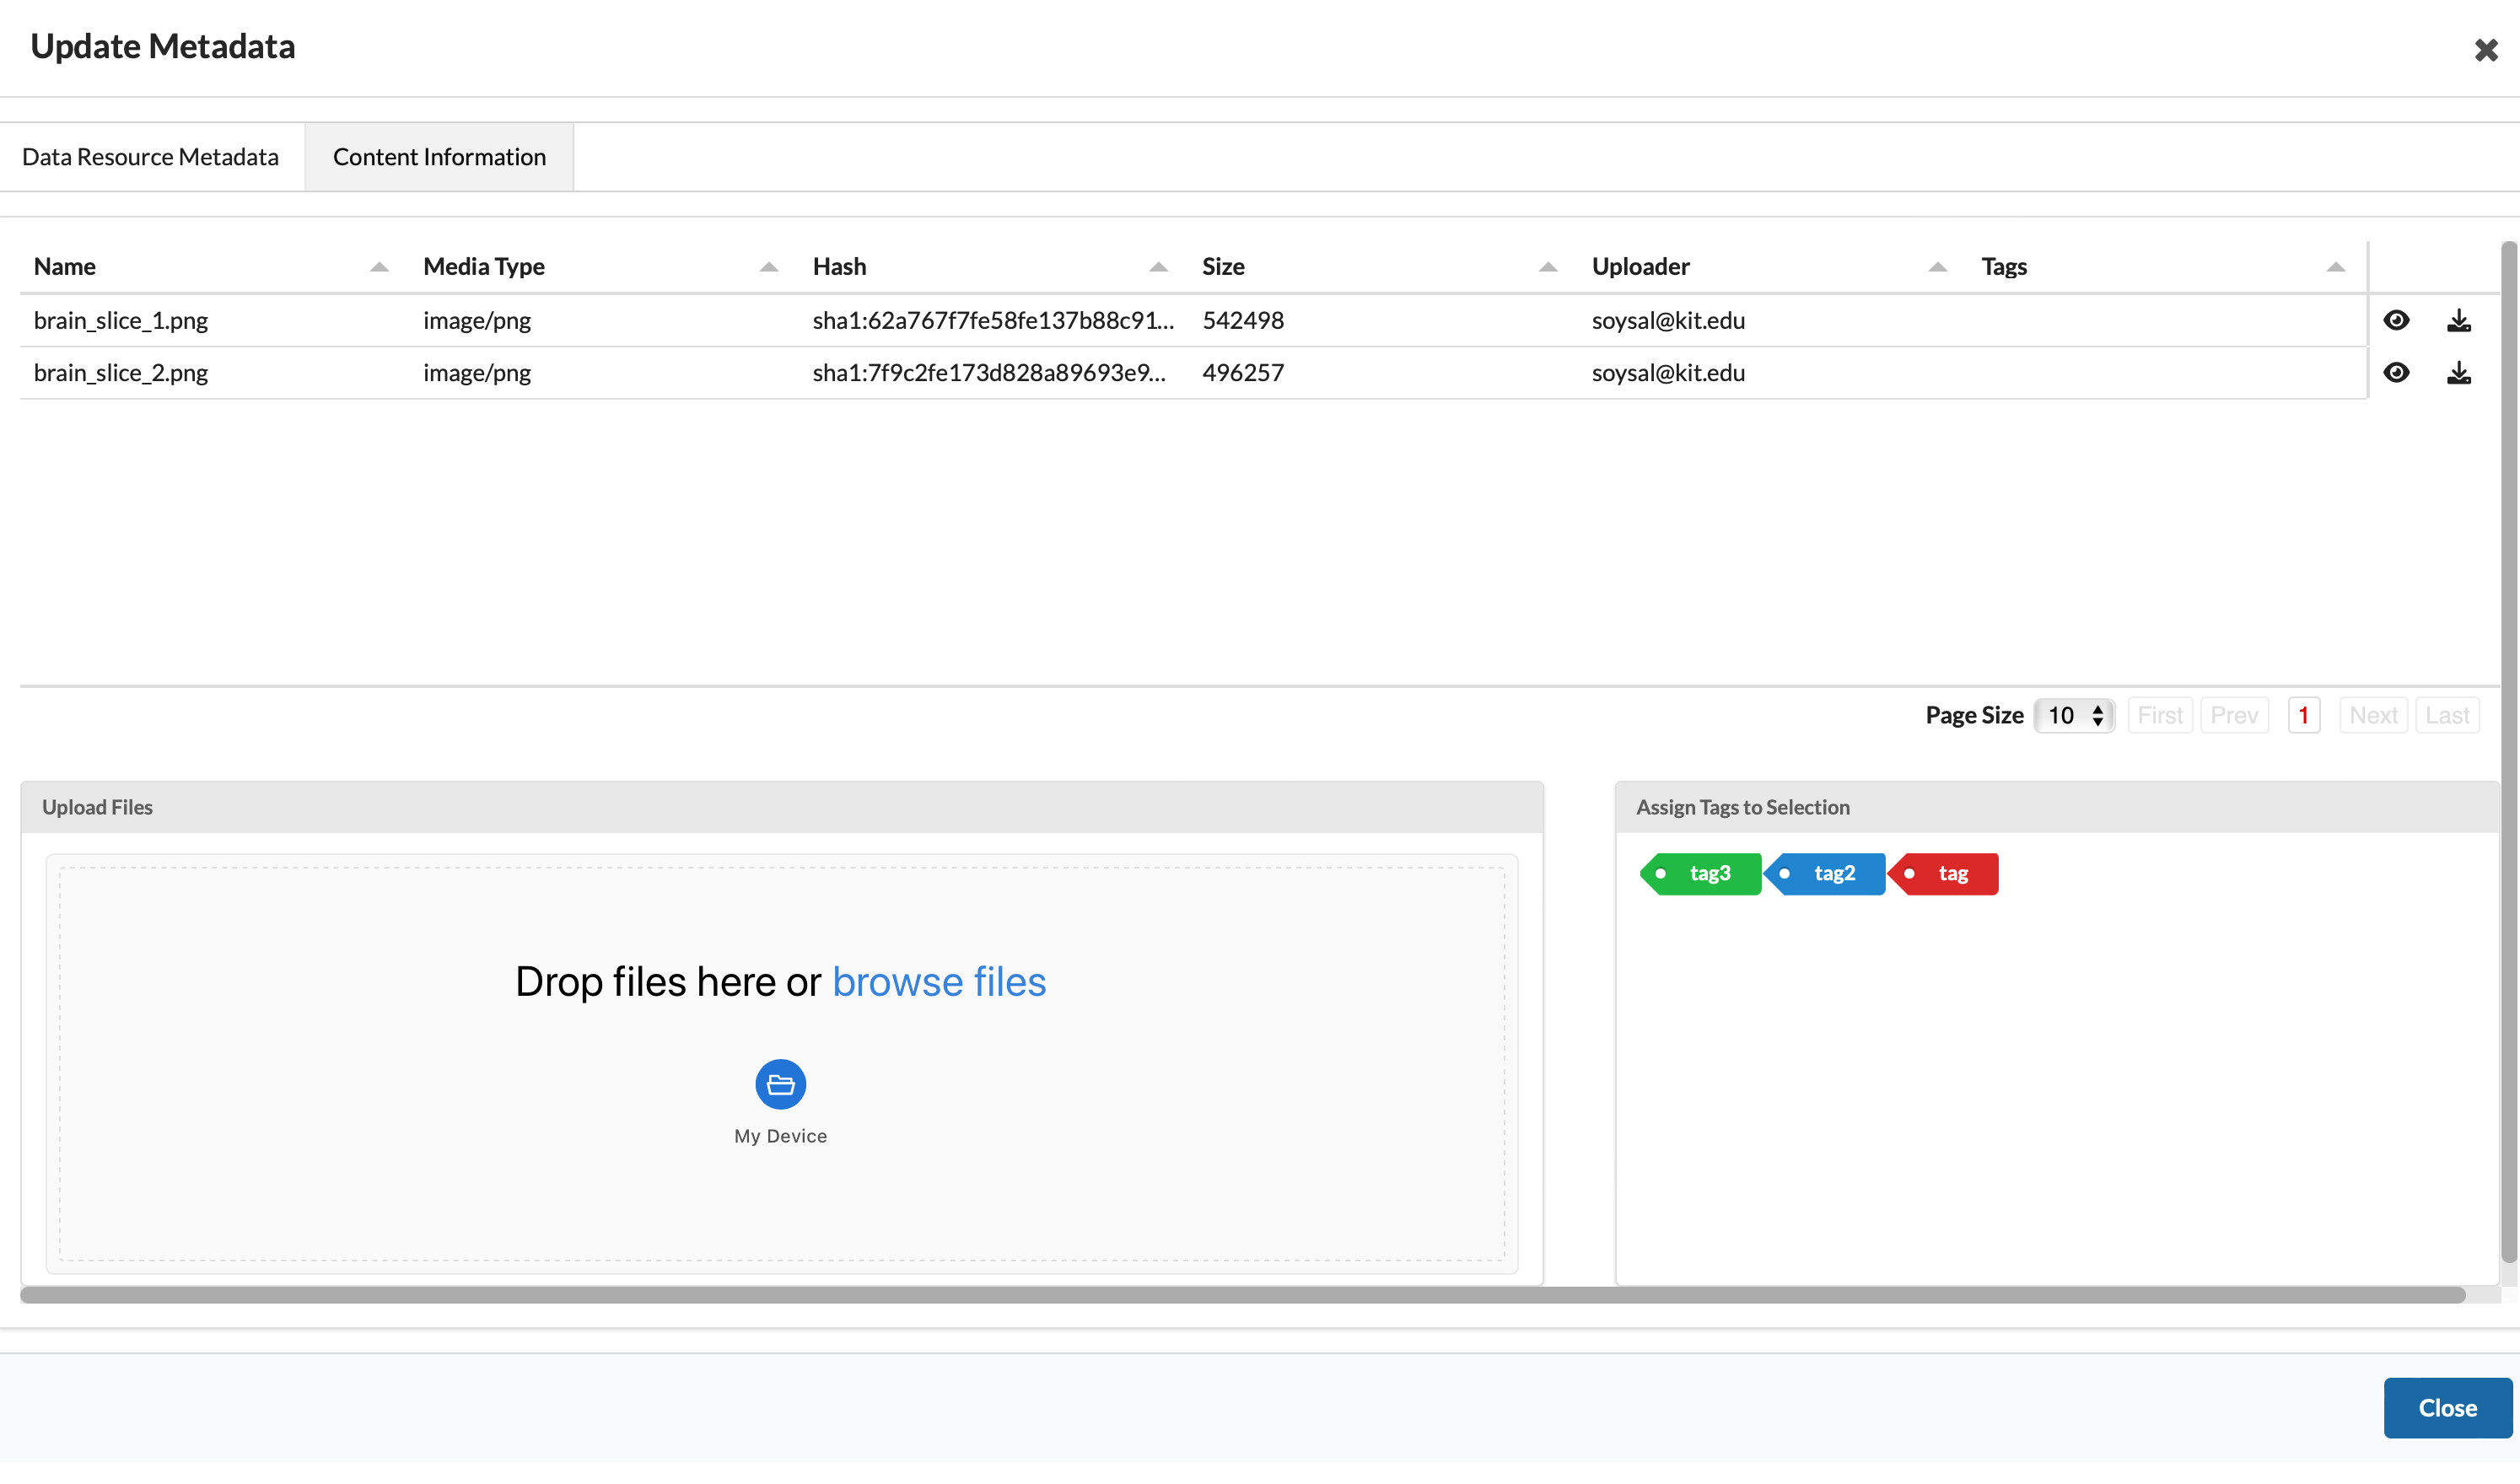
By default, the Data Resource Metadata tab is opened. Click on the Content Information tab next to it, to add content to the data resource. Upload the data (can be multiple file types - image, zip, text, etc.) by clicking on the Upload button in the pop-up window. More files can be added by clicking on the plus button on the top right corner of the Upload Files frame. Finish the upload by clicking on the green Upload n file(s) button, where “n” is the number of files to be uploaded.

-
Now the uploaded content will be listed under the “Content Information” tab.
Using REST-API
On the command line interace (CLI) also, a data resource with a file must be created in 2 steps. First the data resource must be created and then the content must be uploaded accordingly.
General explanations can be found here: https://kit-data-manager.github.io/webpage/base-repo/documentation/update-resource.html
-
First go to command prompt and navigate to the folder containing
get_token.shandenvironment.shas explained in section Authentification using the Command Line Interface -
Edit the content of
environment.shto reflect the credentials of the current user. For more information, refer to section Authenticate using the Command Line Interface -
Type
TOKEN=$(./get_token.sh)on the command line and press enter. - Now follow the commands as written in the code-snippet below and press enter after modifying it. For creating the new data resource, modify all the keys like “familyName”, “givenName”, “publicationYear” with corresponding data. More details on the meanings of these terms available at the Datacite metadata schema. This code will creata a file
response.txt` which contains the information about the newly created data resource.curl 'https://matwerk.datamanager.kit.edu/api/v1/dataresources/' --oauth2-bearer ${TOKEN} -i -X POST -H 'Content-Type: application/json' >> response.txt -d '{ "creators" : [ { "familyName" : "Your Family Name", "givenName" : "Your Given Name", "affiliations" : [ "Your Institution" ] } ], "titles" : [ { "value" : "Title of the data resource", "lang" : "en" } ], "publisher" : "Name of the person(group/institution) Publishing", "publicationYear" : "9999", "resourceType" : { "id" : null, "value" : "Any further word which describes the data resource", "typeGeneral" : "IMAGE/TXT/DATASET" } }' - In the second step, read out the UID of the newly created resource from the file
response.txt. If the resource creation was not successful,response.txtwould contain an error message. This can be checked by executingcat response.txtin the command line. To read the UID, type the following code line by line and press enter.MYID=`tail -1 response.txt | jq -r .id` echo "MY ID : $MYID" -
This will display the UID of the newly created resource. The output would look similar to:
MY ID : 423ece8d-6171-4f9a-9055-77ebb77c05e8 - Now add the content file to the data resource, by making use of the UID. Here, an example is shown with an image file called “surface.png”
curl https://matwerk.datamanager.kit.edu/api/v1/dataresources/$MYID/data/surface.png --oauth2-bearer ${TOKEN} -i -X POST -F 'file=@surface_1.png' - The output would then look like this:
  HTTP/1.1 201
  Date: Thu, 27 Oct 2022 12:52:14 GMT
  Server: Apache/2.4.54 (Debian)
  Vary: Origin,Access-Control-Request-Method,Access-Control-Request-Headers
  Location: https://matwerk.datamanager.kit.edu/api/v1/dataresources/423ece8d-6171-4f9a-9055-77ebb77c05e8/data/surface.png?version=1
  Resource-Version: 1
  X-Content-Type-Options: nosniff
  X-XSS-Protection: 1; mode=block
  Strict-Transport-Security: max-age=31536000 ; includeSubDomains
  X-Frame-Options: DENY
  Content-Length: 0
  Content-Type: image/png
Now the image can be checked with the graphical user interface (GUI).